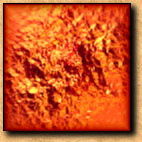
There are two versions of the "paint-splatter" image above. The mask that created the one on the left was cereated by selecting the round, white area, and giving it a single gaussian blur of 16 pixels. The one on the right was created using multiple gaussian blurs, first 8 pixels, then 4, and then 2. After this process, I always *DE* select the area, and give it a final gaussian blur of one pixel, to knock off the harsh transition with the black background. There are two versions of the "paint-splatter" image above. The mask that created the one on the left was cereated by selecting the round, white area, and giving it a single gaussian blur of 16 pixels. The one on the right was created using multiple gaussian blurs, first 8 pixels, then 4, and then 2. After this process, I always *DE* select the area, and give it a final gaussian blur of one pixel, to knock off the harsh transition with the black background.
Note the first image, the single large blur creates a rounded cone, while the multiple blurs create a more rounded shape. This is the process you will use time and time again.
The images were raised by a height of "100", the maximum possible. You'll notice they appear bumpy. This is due to the extreme amount we've distorted the image, remember, that grey mask only has 256 levels. What I've done with the pieces below is this...
First, select the rounded shape, (command+option+T). Choose "select/inverse" to select everything else but the shape. Fill it with black. Invert the selection again, and give it a blur of 1-2 pixels. This smooths the surface, and allows a little black to leak in and define the edges. Invert the selection again, and delete all that black, and you'll have the images below.
You can check out the dialogue box I used in the "Lighting Effects" filter here. |